HOLY SHIT IT’S ALMOST 2020???

BRO WHAT??? The last update of this blog was in APRIL??? HALF A YEAR AGO??? Time flies when you’re busy!

So a little bit of a backstory on my absence.

In the past few months I got an intership, I graduated and I got my first real job! (That means I have money now :))

In the past few months I also joined a few rides with some friendos and another Youtuber called Fx Throw him a sub and tell them CDA sent you!
I also went on a ride to Taco Bell, once in Breda, once in Eindhoven.
We still need to plan a ride with EVERYONE to Taco Bell Tilburg!

It takes around 2 hours to ride but as always:

“It’s About The Ride, Not About The Destination”.

Also, I have made a few updates on my motovlogging setup which you’ll see in my upcoming video, but till then, further testing with the new camera will be done.

There are also a few (understatement) upgrades and mods on my bike such as an 8 spoke wheel I got from an old VFR750 and repainted it to look like this!

And it came out like BRAND NEW!

I then put a tailbag on it, and a DynoJet PowerCommander V, which does work wonders with the fuelling but I still need to adjust it a little bit to let it run a little leaner.
Then I replaced the clutch hose to a copy of AliExpress, which works wonders by the way, and replaced the clutch slave cylinder seals.
The VFR feels like new again!

Since I work now I have made some upgrades to my gear. I now have Alpinestars SMX-6V2 GoreTex boots, which I melted to the hot exhaust on the day I went out with the boys to get some Taco Bell. SUCKS BIG TIME!
Then I glued some aluminium plates to my boots to fix the hole in the new GoreTex membrane and to act like a heatshield.

Anyways, a video about all that will come in short notice when the weather clears up.
Hope to have entertained you and I see you in the next blogpost or video!!!


Combining work & Motovlogging

Bruh, I know it has been a long time since I’ve written something on my blog nor uploaded something on my YT channel.
It keeps growing, but I seem to lack time to make more content on the subject of my bike or motorcycles in general.

The main reason for that is having an internship that goes from 9 to 6, emptying my creative brain behind the videos.
The next reason is that I can’t seem to get interesting content to talk about, because most likely the next video is (again) about my bike upgrades.

I have had some wheelstriping on my VFR, which (I told in a vlog) I removed, and wanted to replace with new wheelstriping. This happened, but soon after the wheel striping just rubbed off and was just peeling of the rim. Thus I have ordered more wheelstriping from (I hope) better quality.

My VFR800 with new wheelstriping
AliExpress Wheelstriping

It looked good but it was just shoddy quality.

I hope to get out a new motovlog soon with more updates, but as always, ride safe and have a good motorcycling season!

Dropped the VFR

It finally happened, I dropped the VFR on the ground…
The picture says everything, but I will explain everything in this post! (see that reference?)

So the problem with my thinking is that I think in weird ways. Like trying to ride a motorcycle up a slippery curb. That ultimatly failed as you can see on the picture above. Seemed like a good idea in my head since I’ve already ridden on snow that day, but this is a different kind of snow so it seems.

This bike is heavy, like, really heavy at 245kg! Being on slippery snow/ice and grass underneath didn’t give me enough grip to put the bike back upright. Because of that, I was forced to drag the bike on it’s side to the beginning of the curb, scratching the fairings a minimal amount.

My father and mother both came to help, because this crash wasn’t even 100m from home. After half an hour of pulling, lifting and struggling, the bike was finally upright!

The damage
– Scratched/pitted left bar-end
– Scratched/pitted clutch reservoir cover
– Bent footpeg scraper
I didn’t find any extra scratches because the previous owner also dropped the bike on the left side. However I ordered a paint touch-up pen on eBay for like 10 Euros in the color R157. I don’t have pictures of the damage, because I already fixed them.

The lesson?
Don’t ride in the snow!

I even filmed the whole ordeal, including the salvage operation!

Review: QuadLock for Galaxy S8+

You might know I’ve made my own smartphone mount out of some plastic, but that idea became boring and more and more a pain to use than being handy.

It was time for a new mount that is safe, easy to remove, and good looking too.

I searched online for different mounting systems, but the RAM X-grip can get loose and it still is a two-hand operation, just like the UltimateAddons waterproof case, that is not usable with phones with a case. (see below)

1_1_1
UltimateAddons waterproof case

Then we have the Rokform mounting system with integrated case, which uses a similar interlocking mechanism as the Quadlock, but relies on some neodymium magnets to keep the phone secure on the mount. The Rokform is also not safe in landscape mode.

417pDHCzR2L
Rokform mount for handlebars

And alas, we have the Lifeproof mount. This one also relies on a magnet, but has a little tab that can be flipped to lock the phone in place. However, the design looks too flimsy and there is no way to attach the Lifeproof mount to a RAM ball without vibrations.

lpla-qms-bikemount-20
Lifeproof mount for handlebars

The one that caught my eye in the past few days was the Quadlock, because it has an ad running on Instagram (good lord, ads work on social media!) The design is good, it has a physical lock with audible feedback, it can be used in landscape AND portrait, and it doesn’t cost the world!
The photo shows a handlebar mount, but there is also a RAM, mirror, bike stem, car, sports armband, wall, belt and tripod adaptor mount available.

quad-lock-out-front-mount
The Quad Lock has a locking system

The case & mount together cost around 54€, and that is with the 10% discount on their site (quadlockcase.eu) by registering! The only downside is that they only accept creditcard or PayPal, so for the people that use Maestro or iDeal, tough luck.

The only downside on this mount, is that it is mainly made from composite material instead of aluminium. I hope the longevity of the mount will outlast my phone.

The case is made of a composite material of TPU and Polycarbonate, which makes it flexible, but also very strong. It has a microfiber lining to protect the glass back of the phone, and best of all, it is also compatible with wireless charging, although it took a few tries to get it charging.

For non-Apple or Samsung users, there exists a universal adaptor for your phone or phone case, which uses a 3M™ VHB adhesive. However, it will not adhere to rubber, silicone, TPU or soft touch coatings.

product
Quad Lock Adaptor Sticker

The mount fits securely in on the bike using the RAM arm, but it vibrates a bit because of my fake RAM ball mount from AliExpress, so results may vary with the quality of the parts you are using.

The verdict?
The Quad Lock mount and case is a very handy solution for iPhones, Samsung’s Galaxy phones and it also sports a universal mounting system.

If you already have RAM X-Grip on your bike and you want to upgrade it to a more secure and easier mount, the Quad Lock is perfect because it is just plug and play. No special tools needed to mount it to your bike.

If you want to mount your phone directly to your handelbars or mirror, you can get a full kit on quadlockcase.eu for €69.90 without 10% discount. The universal one costs around €54,90 without 10% discount.

So the price is on par with the UltimateAddons kit, above the LifeProof mount, and lower than the RAM and RokForm kit, whereas the latter costs 99.99USD for the mount itself.

All in all: Good price/quality ratio, good enough design, good protection and very easy to use!

Top 10 Motorcycle Must Haves

I’m currently having too many tools in my bike’s frunk, and can’t seem to remove more stuff to make more space inside to fit other things in it, so I’ve made a list of the top 10 things you need on a motorcycle!

1) First Aid Kit

Held First aid kit
You never know when you need to use it. For assisting, aiding yourself, aiding your injured friend, etc… I don’t even know if it’s mandatory to keep a first aid kit in your bike at all times, but for cars it is.
I’ve never used mine, but it’s a HELD First Aid kit that costs around 20€.
It’s also fairly compact at 14cm x 15cm x 5cm and includes all the neccessary things (scissors, band-aids, gloves, gauze, …). The waterproofing also makes it possible to keep it outside in the elements.

2) Tire repair kit (only for Tubeless)

Tire repair kit

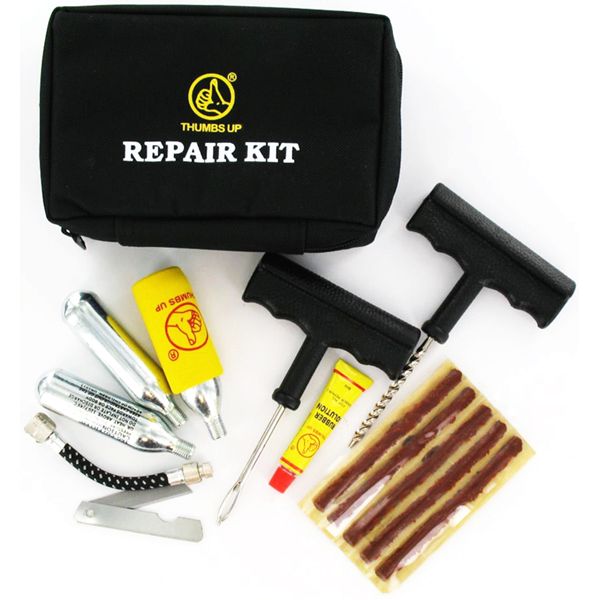
This one I also never used, mainly because I never had a flat. It uses rubber plugs to plug the hole in your tire. It’s as big as the First Aid Kit at 16cm x 11cm x 5cm. It contains a reamer, a mounting tool, 5 rubber plugs, rubber cement, knife, and 3 CO2 cartridges (and hose).
This pouch has a lot of room to spare so I’ve put in some allen keys, some wrenches, but you better be prepared when it happens.
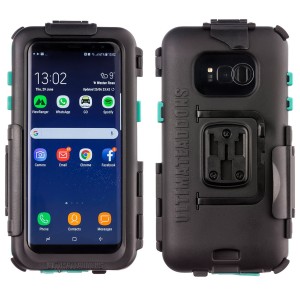
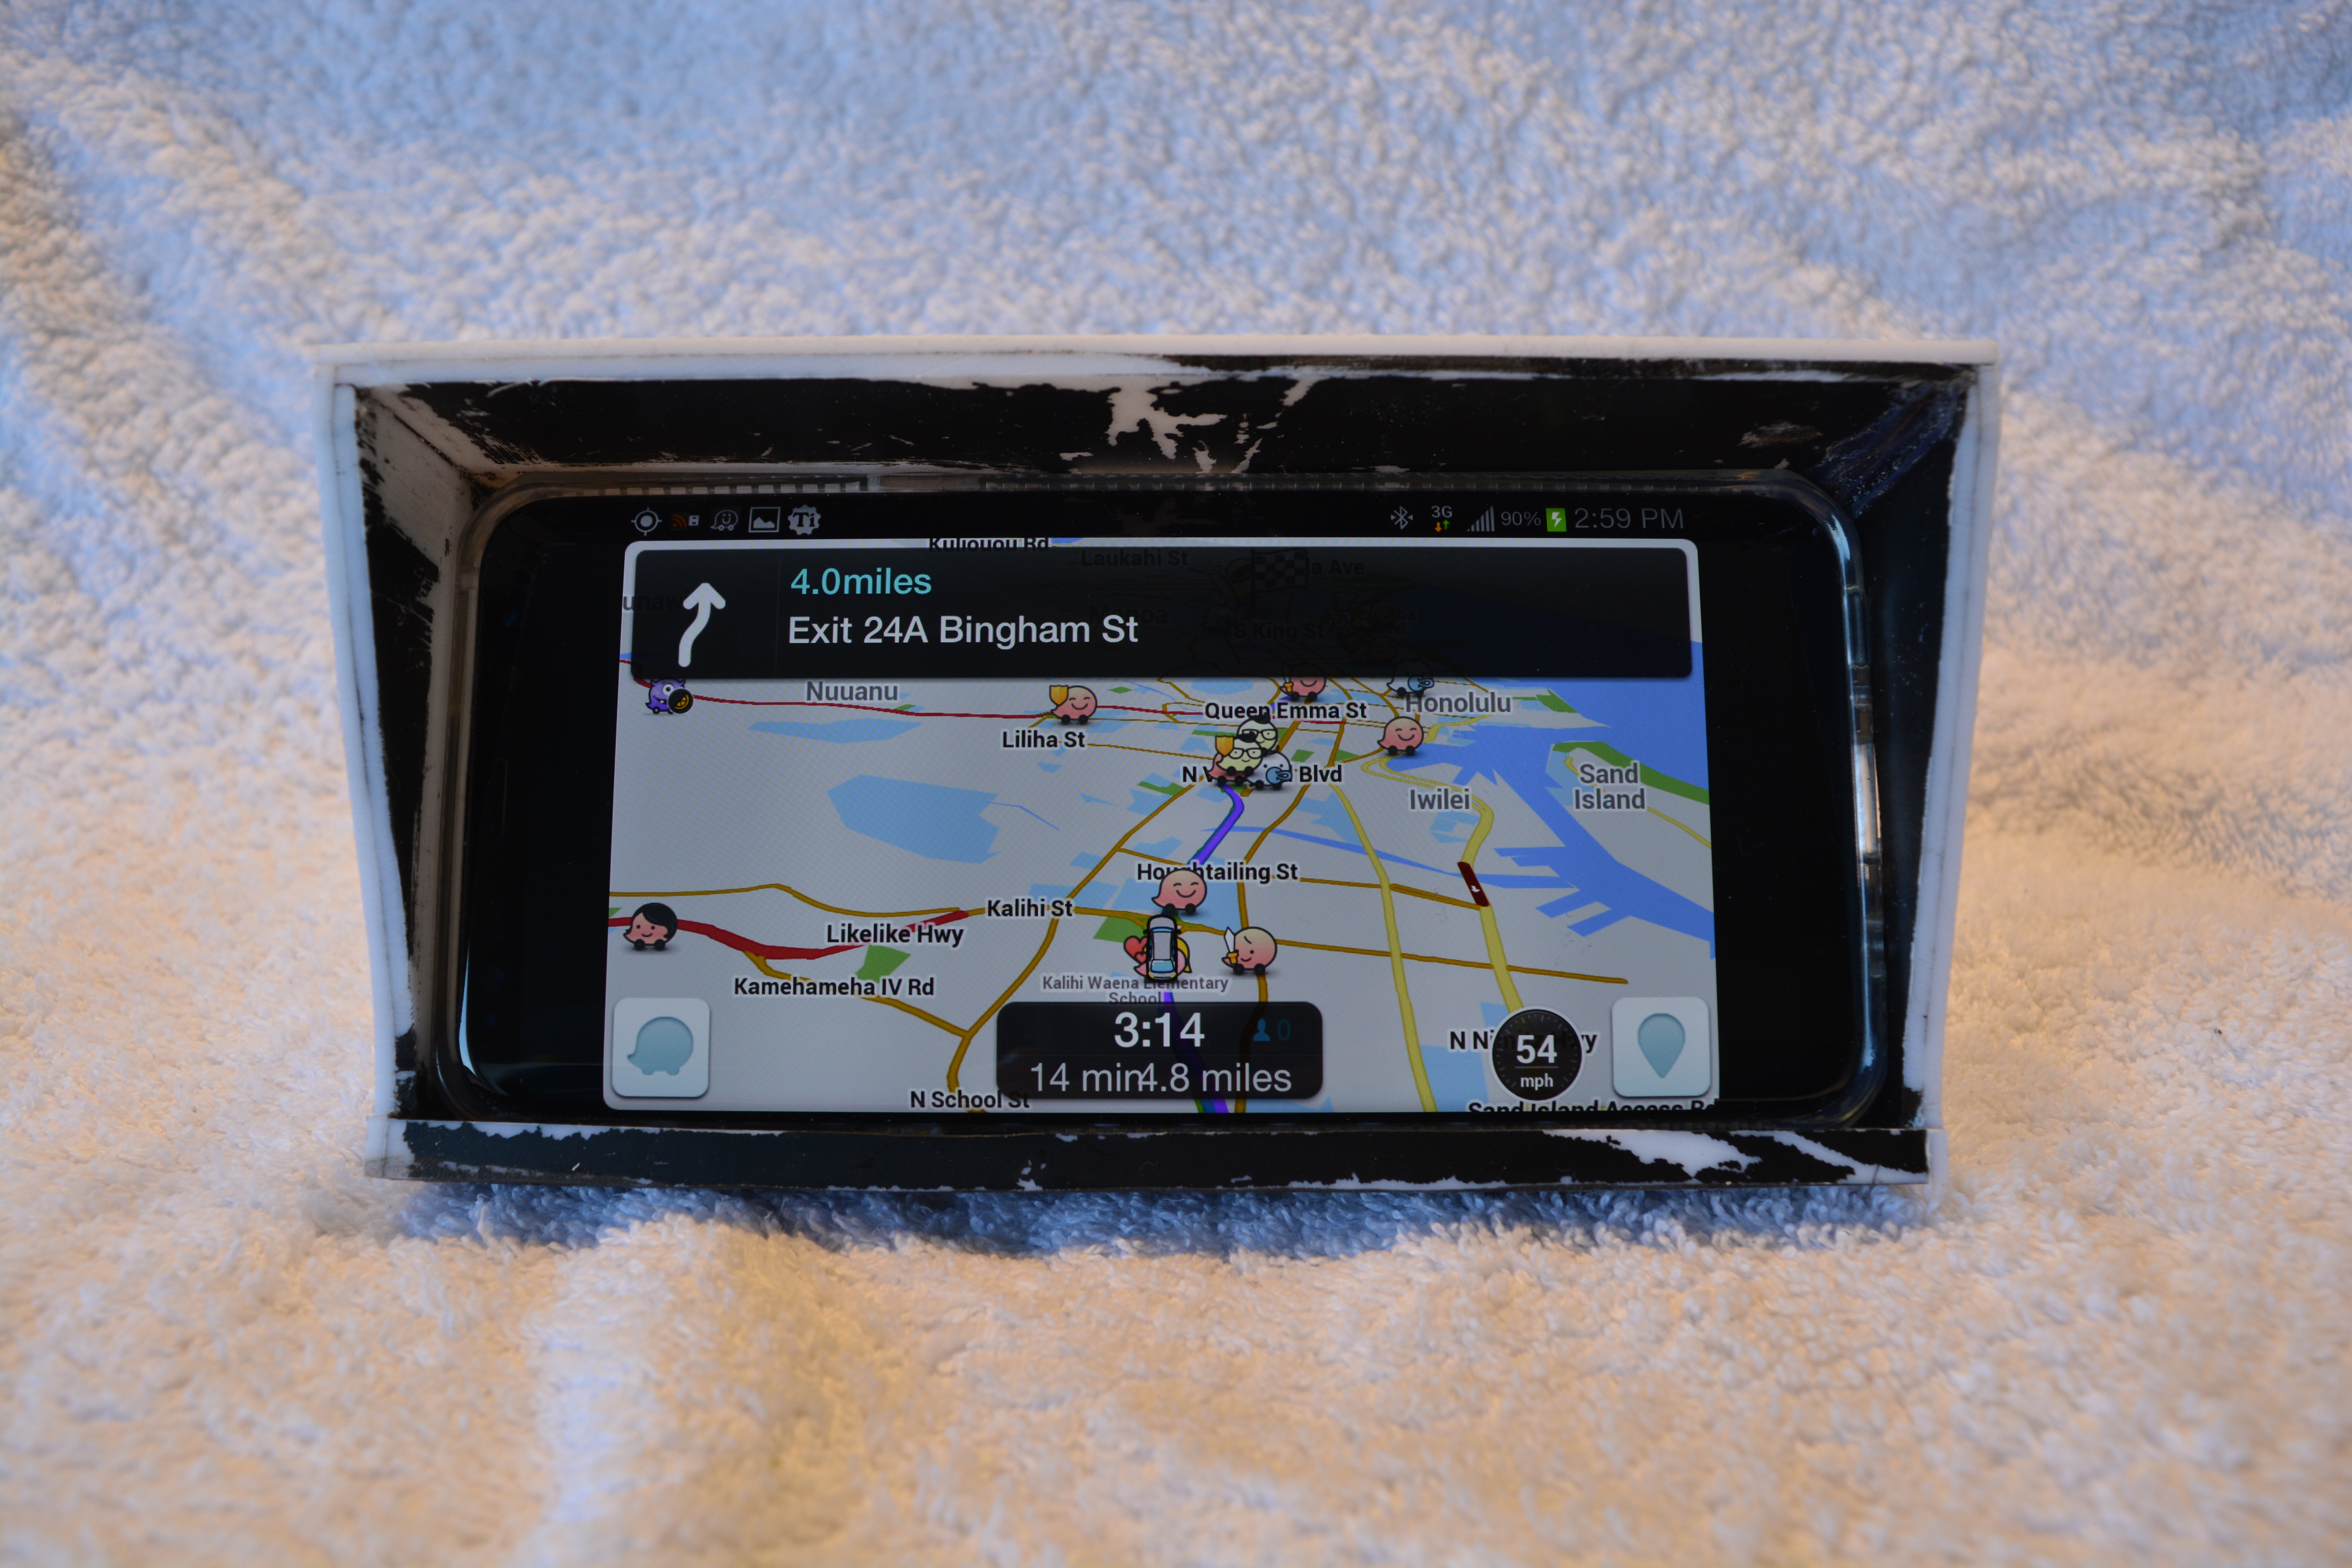
3) Phone mount

Motorcycle phone mount

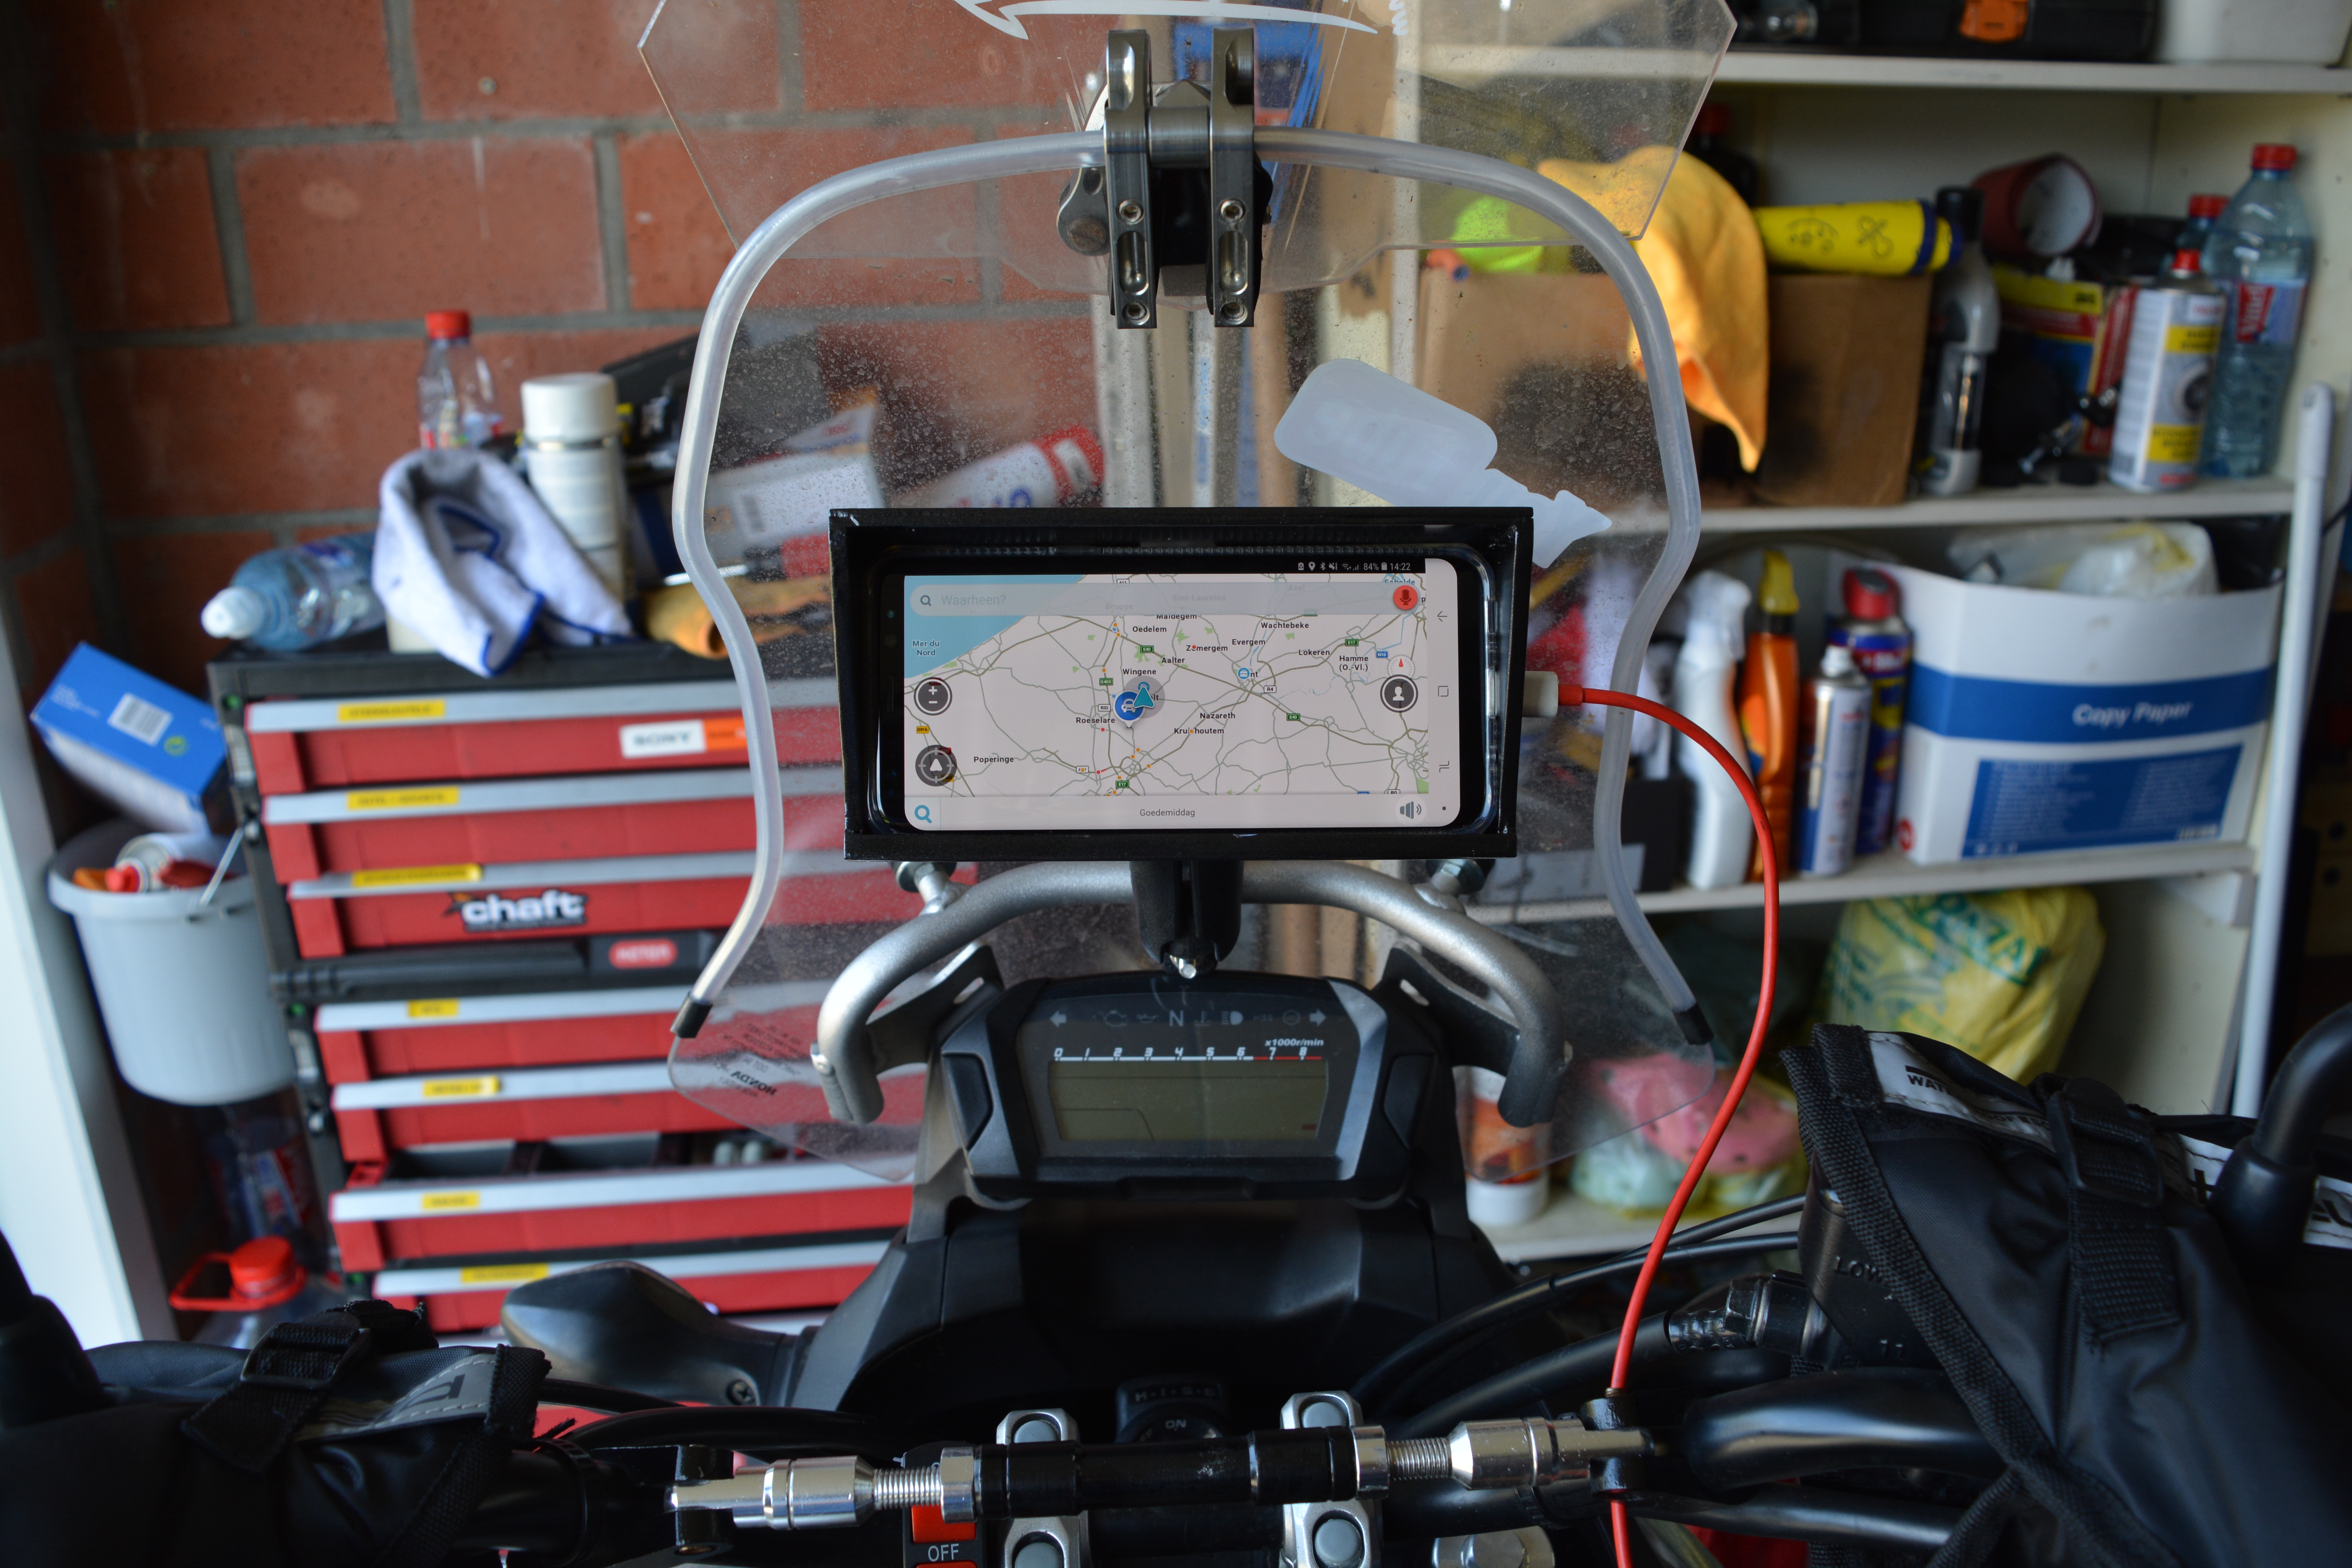
I use this all the time, for commuting, travelling, just taking a ride, navigating,… The possibilities with a phone are endless! Especially if you can make your own routes!
A good site with a lot of options (but only Samsung and Apple) is UltimateAddons.com
They have a plethora of mounts that are waterproof (Apple from 5 – X, and Samsung from S6 to S8+) They are quite expensive, but they are worth it.
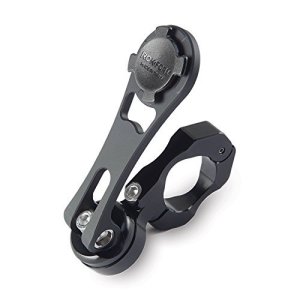
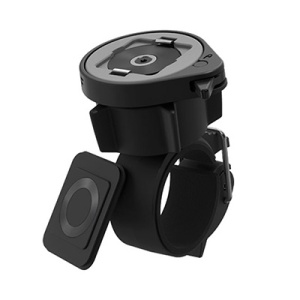
Otherwise you can also build one yourself! (but it’s not waterproof)

Used in combination with a 12V socket or on bike USB charger.

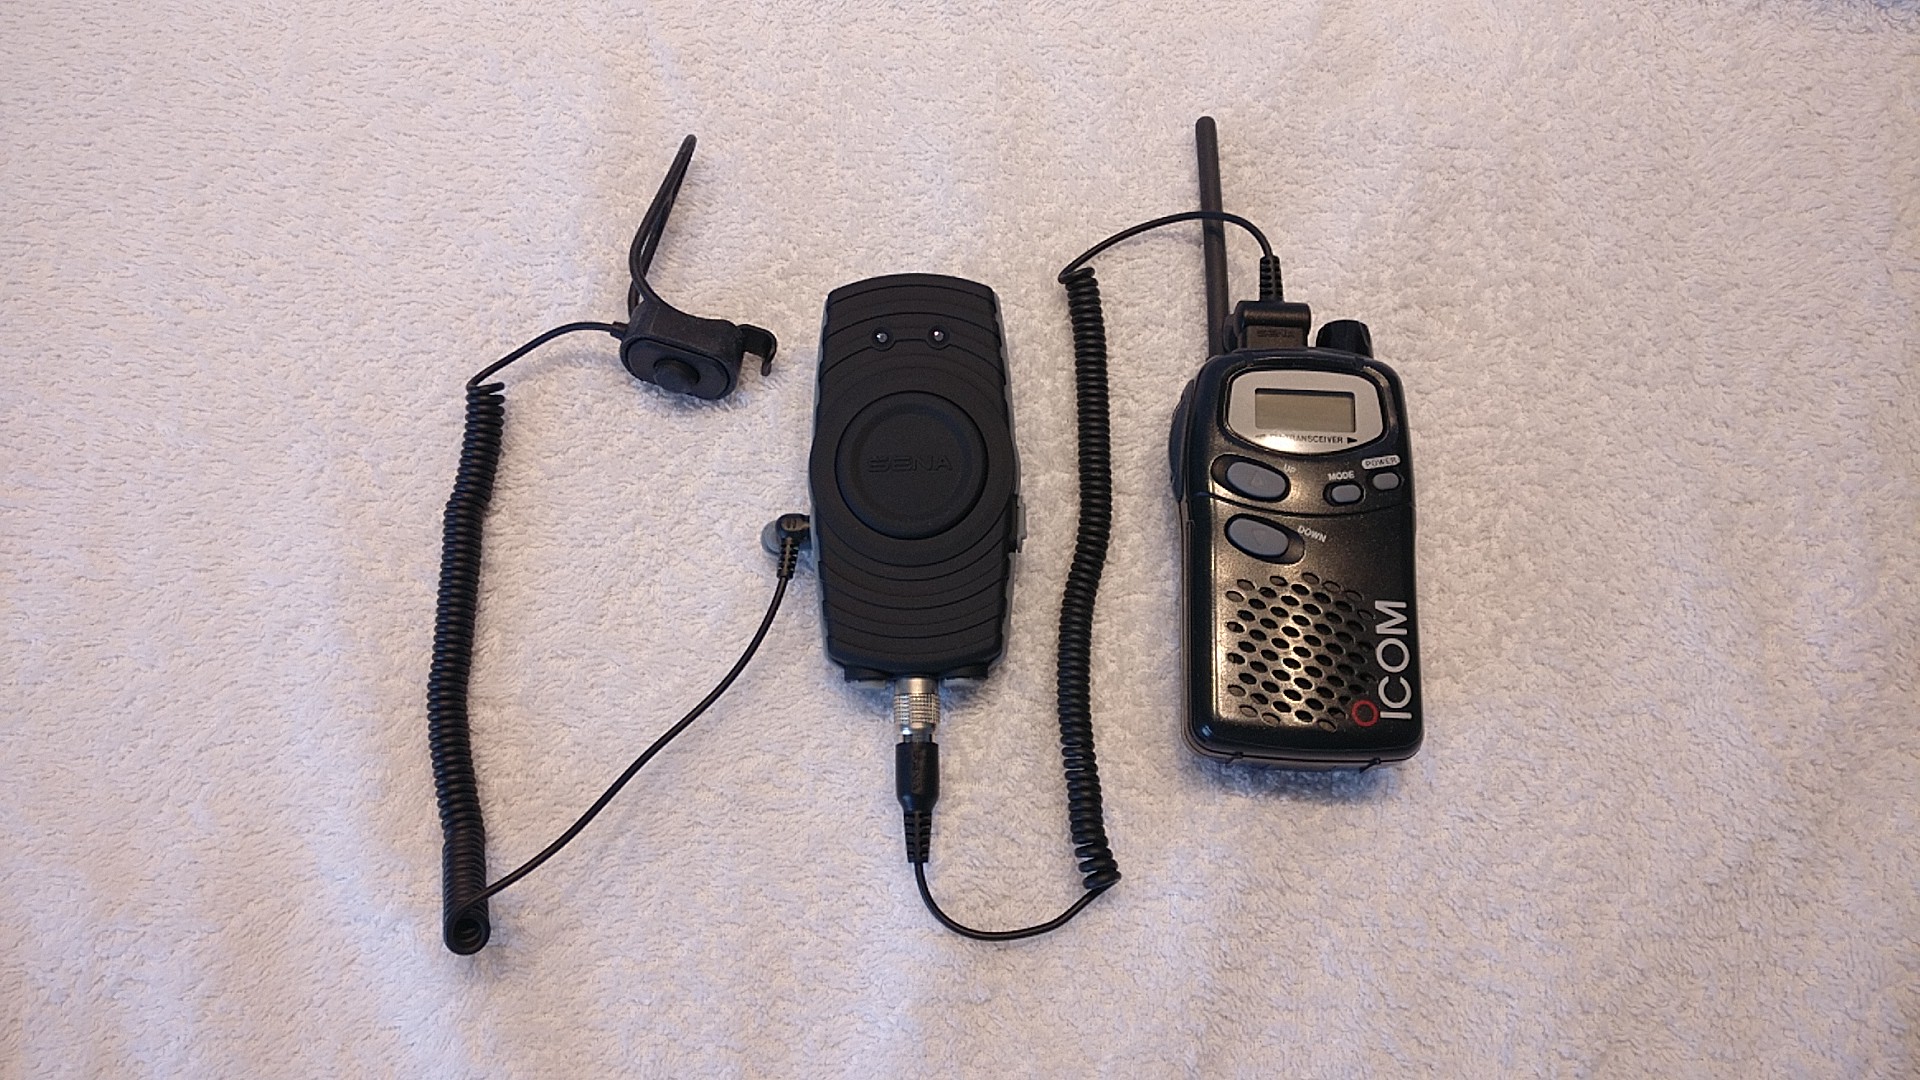
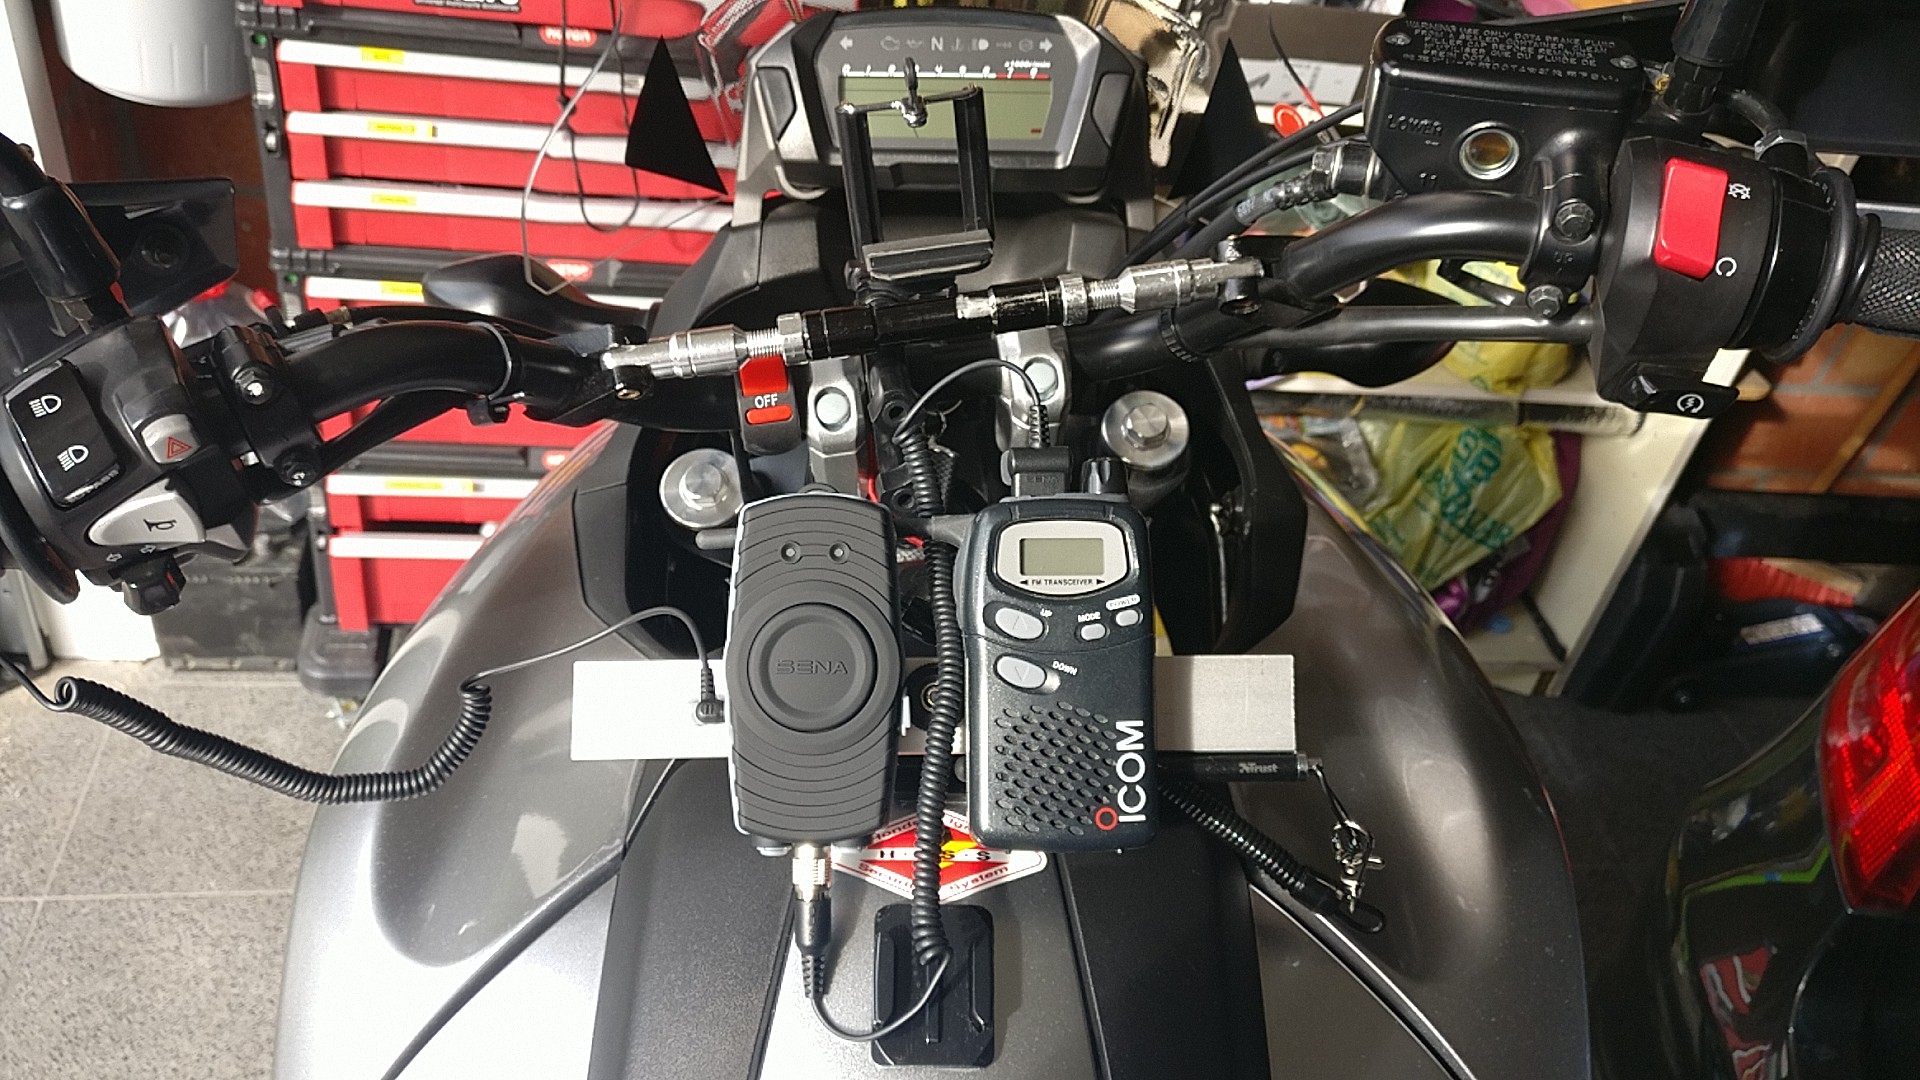
4) Intercom System (or bluetooth)

Sena 3S

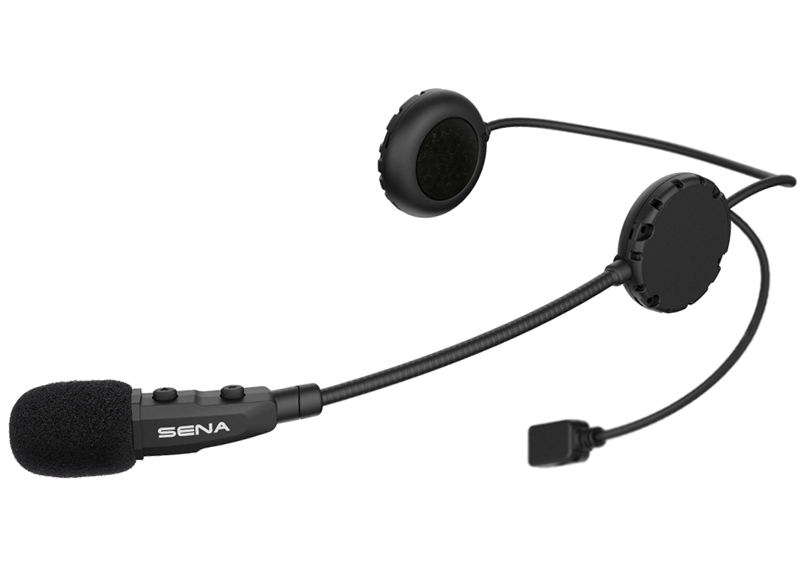
This is used in combination with the phone mount, because who wants to see instructions but not hear them? If you don’t ride with friends, but do listen to music and have the occassional call from someone, the Sena 3S is the perfect candidate for you!
It has multiple versions for full face, open face and modular helmets, and the call quality is very, very good.

For riders in group, the Sena 20S or Cardo Smartpack are the best.

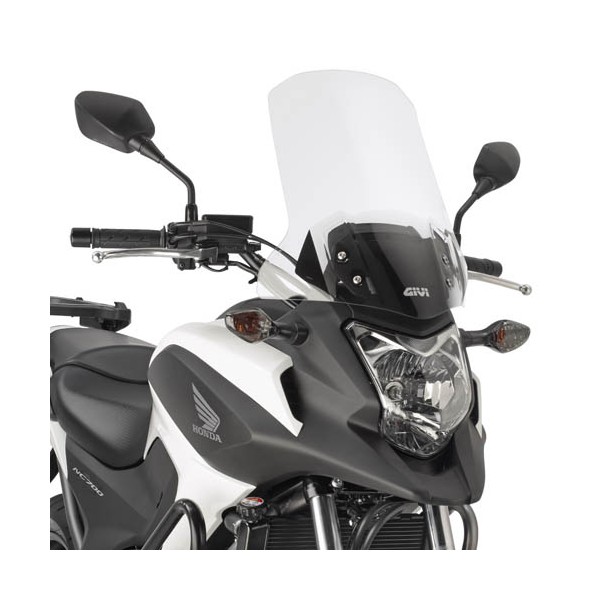
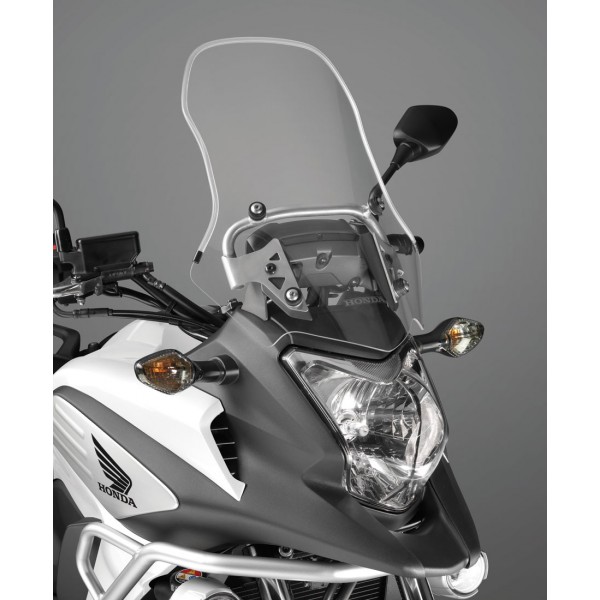
5) Baggage Net and Elastic Baggage Cord!

Baggage Net

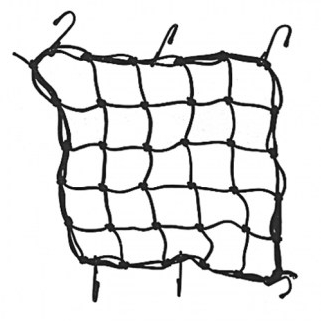
These are immensly handy if it comes to transporting huge things. I’ve bought the Givi HP1111 handprotectors and I didn’t have my topcase with me, then I remembered that I still had a Baggage net under my seat, and it never came loose!

Of course it is also usable for normal baggage.

6) Camera

Sony HDR AS300 V

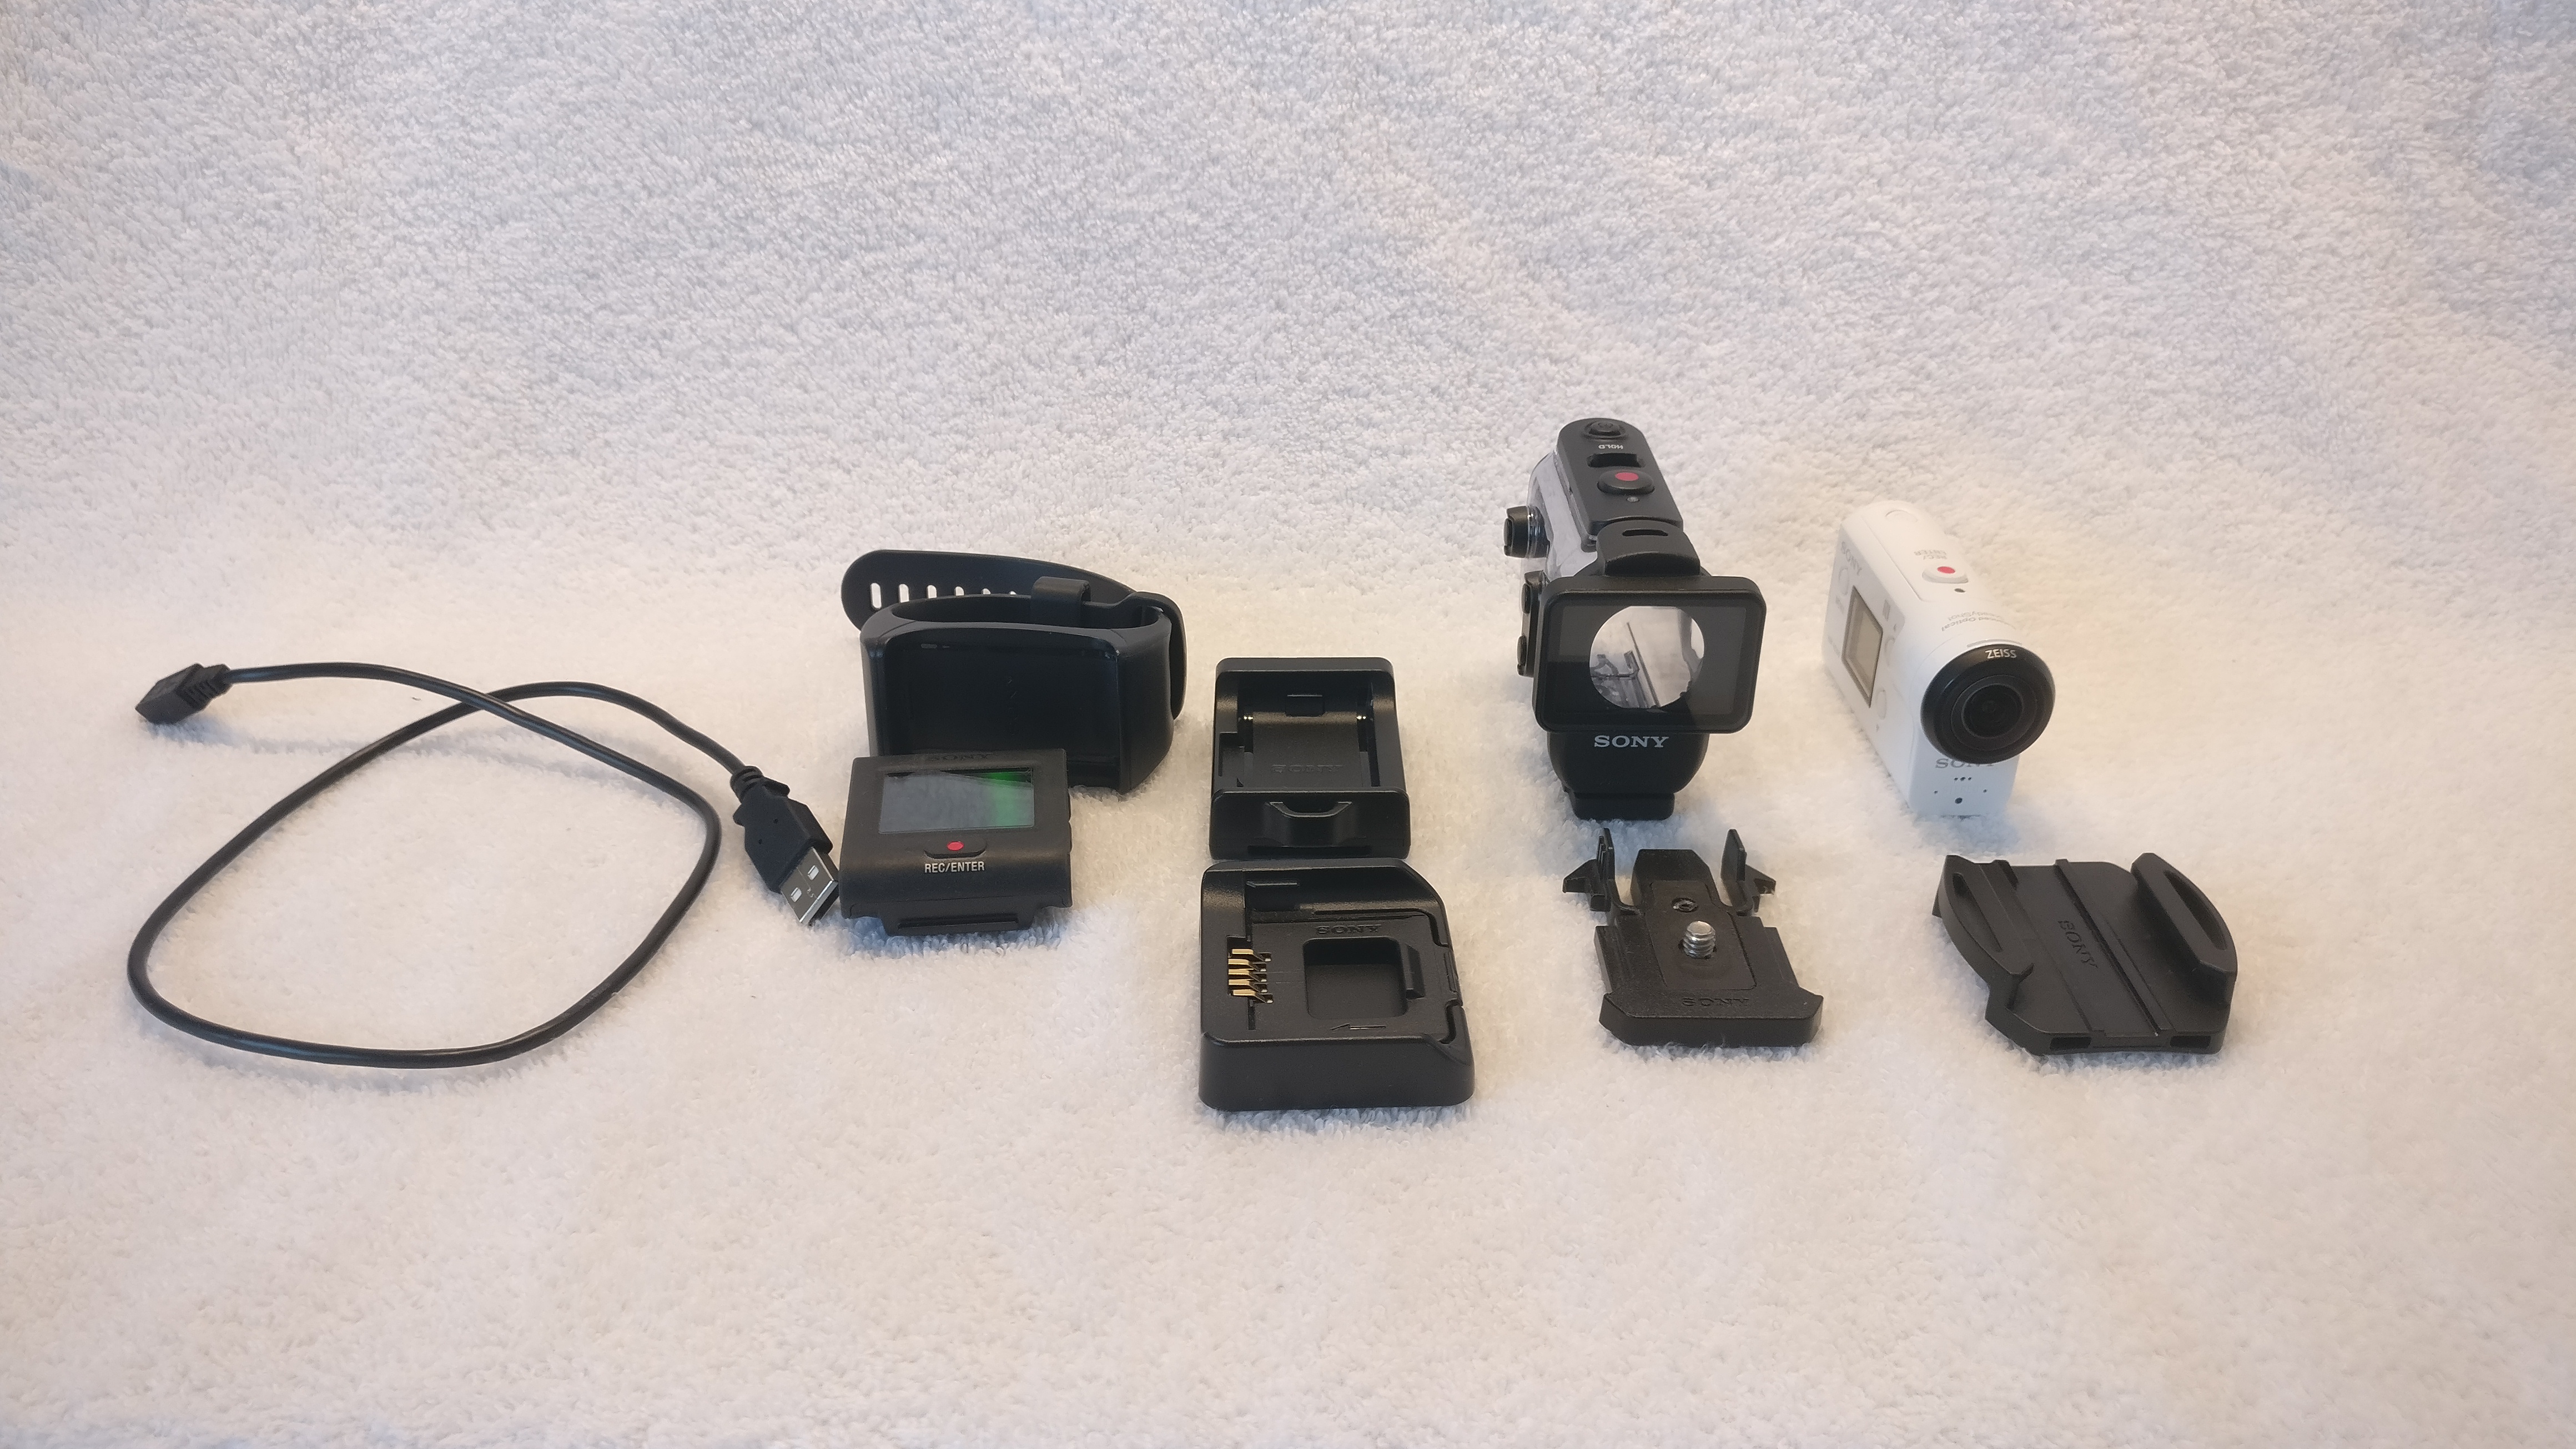
For this you need to check your country’s legislation about using dashcams.
For instance in Austria and Luxembourg it is forbidden to use an action cam/dashcam on the road.
In other countries it is interesting to have, mostly because of road rage and crashes.
If you have everything on video, they can not lie about what happened.
Although you shouldn’t do anything self incriminating if you’re rolling the camera (I see you MaxWrist)

7) Factory Tool Kit

NC700 Tool Kit

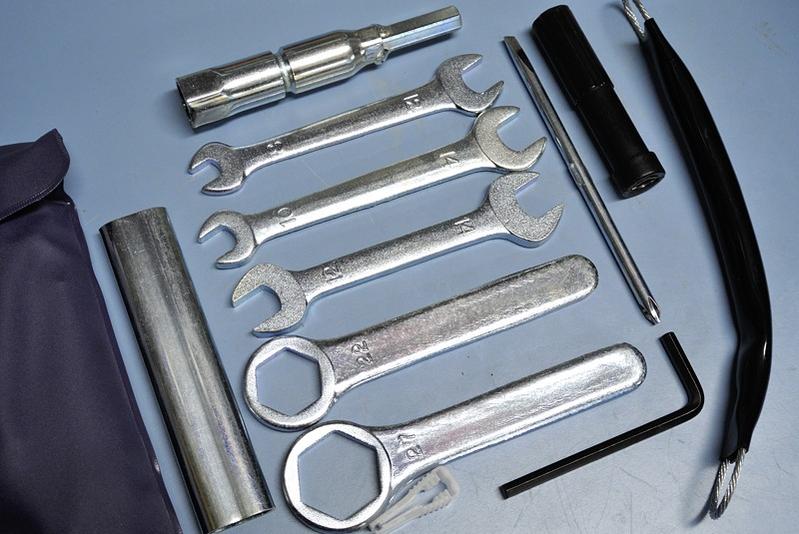
Most riders just throw the factory tool kit out, but it just contains everything you need to fix small issues on your bike like adjusting the chain, removing fairings, tightening some nuts and bolts, removing sparkplugs, replacing fuses etc…
It’s a kit that is very complete, so never remove it from the bike to save weight, just eat less and exercise more!

8) Pocket Tissues

Tissues

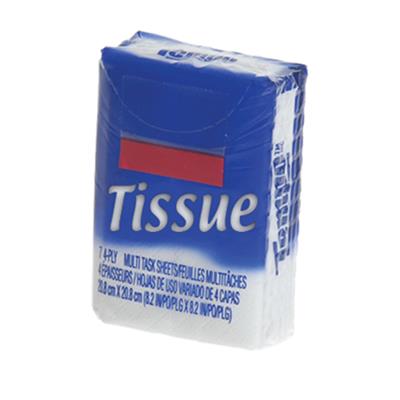
Do you have hay fever? Are you allergic to pollen? Do you need to blow your nose?
With having pocket tissues somewhere on your bike, you never forget your pocket tissues anymore! It has saved me a lot of times when I had to blow my nose and didn’t find any tissues in my jacket. It can also be used to remove dead flies from your helmet or cleaning out a wound. A must have indeed!

9) Your DB-Killer(s)

db killer

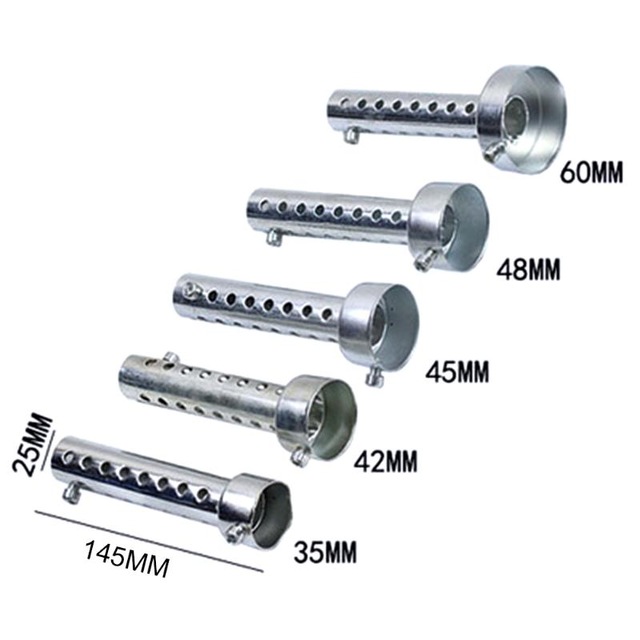
Ever had the police to come say your pipes are too loud? Me neither! But if it happens, you better come prepared, so you can put them back in and evade a noise complaint ticket. (requires toolkit too!)

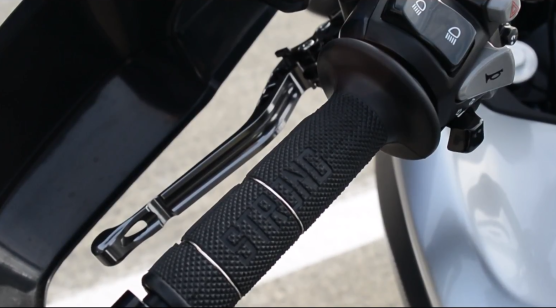
10) Adjustable levers

rizoma lever

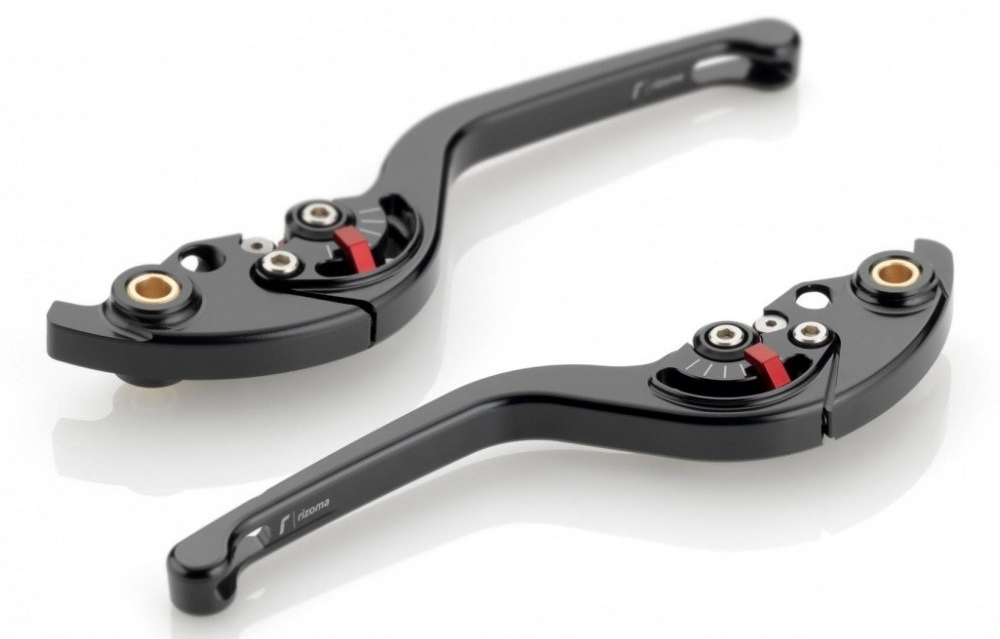
Are your hands too small to reach the levers comfortably?
Fret not, adjustable levers to the rescue! I have chinese adjustable levers on my bike, but should you be worried about the quality, you can always buy Rizoma or Pazzo adjustable levers. These will increase comfort and look good too. Should you be in a crash, the original levers probably won’t give way, and break off, rendering them useless to ride further.

Conclusion:
There is no need for fancy expensive gadgets to decrease the risk of stranding or having discomfort while riding your motorbike. Whatever works for you is perfectly fine. The things I listed here are things that reassure me that I won’t have any problems getting help or helping other people by keeping these things (first aid, tire kit, tool kit) on the bike.
If this list helped you, please leave a comment!

Why is it so silent around here?

Allright, I’m finally done with finals, and I hope I’m having no F’s on my report card.

So, why was I so absent in the last month?
Probably because I have no time to ride, because I had to learn for finals!
Enough about school, let’s talk motovlogging!

Question time (from me to me):

Q: Why aren’t there any updates on the bike?
A: I haven’t got the time to film everything, and writing scripts take time. Being the impulsive one, I installed a K&N filter (where I’m going to write a review about) without filming it.
I also consider the bike finished “by now”. I’m still unsure when I can do my full license to ride, because I miss having the “oomph” the NC700X makes when highway cruising, but in city traffic it is just a beast.
It’s also the period where I have to pay my road tax (July) and service (September), which is a huge cut in my budget.

Q: Why aren’t there any motovlogs?
A: I don’t have an interesting topic to talk about. Probably all topics have been talked about?
Maybe I can talk about what mod is my favourite, and what my least favourite one is?
(Hey! That sound’s interesting! :))

Q: Why are there no periodic blog posts?
A: I’m not sure, probably because writing reviews takes a lot of thinking, time and taking pictures while doing bike work, and I also forget to take pics lol.
This blog is also for the “really interested ones” in my blog, because I still have a small YT audience of about 260 subscribers at the time of writing.

Q: Why do you rage so much?
A: I don’t rage everytime something happens! I’m a well preserved guy. Well, the only things hitting the Youtube surface are cherry picked moments of rage, as in my most recent video: THIS MAKES MY BLOOD BOIL it is normal to react to a bicyclist that just crosses the road with no markings, and he appears behind a van which obstructs the view.
If you do stupid things, you get a rage fit, BUT it alleviates the grudge so fast that I forget about it the next day, except when I make a video about it and get notifications on my phone :’)

I hope to upload more videos in the course of the next month, but I also should spend a little bit more time to apply for internships because in the second semester of the upcoming academic year, I have to work as an intern in a marketing bureau or in the department of marketing on different cases.

Wish me luck, and also happy riding day’s to y’all reading!

Building a Samsung Galaxy S8+ Smartphone mount

Since I’ve bough a new phone that is waterproof, and fast enough to give me instructions via the GPS, I wanted to build a good custom mount for it.

There are waterproof cases including mounts for the S8+ on Ultimateaddons.com, should you want to buy a case for the bike. The prices of these are also good, but they are only for phones without a case. Thus bringing me to this idea.

I’ve had some styrene sheet laying around, and began mocking up the outline of the phone including the case.

This is what I came up with:

I painted it black, and wanted to test the quality of the work, which ultimatly failed by cracking the seam that holds the shade together.

Seeing this flaw in my design, but having already built a good platform, I began to improve it by adding another layer of styrene sheet to the original layers.
This needed some sanding to remove the seams between the glued pieces.

To reinforce it even more, I added some strips to the back side to cover those seams too.

As you can see, there is a hole in the back to put your finger through to remove the phone, because it’s locked in there tight, even without the charger attached to it.
The charging cable also doubles as a “lock” to keep the phone in place.
This works like a charm and is safer than just clamping it with a spring loaded clamp.

In the pictures above this text you can see how the charging port makes sure the phone doesn’t move.

Here you can see that I’ve added drain holes to remove unwanted water from the dock, should it get wet. I tested this in the sink, and it works perfectly to remove the water inside.
This should also work when the bike is parked outside without the phone in it.

pre finished mount
Waze is a great motorcycle navigation app (more info @ www.waze.com)

The cradle has been painted to make it look a bit better, and now has been mounted to the bike.

In the last picture you can see that the phone can be placed in the mount in one way, so it could never fall out on accident. It is a friction mount, so no locking hardware is needed (except for the USB-C cable) to lock the phone in place.

A few remarks:
I have bought a China-made RAM mount (X-grip copy), and the only things that are usable are the RAM balls.
They are made of a cast rubber ball on a hard (composite/abs) base.

I wasn’t aware that the original RAM arms are made of metal, which means that the arm is prone to cracking if you tighten it too much. This happened, and I’ve bought a genuine RAM arm since, and that works like a charm!

Here’s a video explaining (almost) everything should you want to watch it:

Comparison: Givi D1111ST vs Honda Tall Windshield for Honda NC700X-750X

Now that I have multiple windshields for the NC700X I thought I would write a comparison between the two and see which one is the better one if you’re on a tight budget.

To begin with: I got the Givi D1111ST for free on my bike, and bought the Honda tall OEM windshield a week ago. “Why?” you might ask, is because the Givi D1111ST had a crack at one of the bolt holes, which I then proceeded to close up with superglue. That worked for a while, but then it cracked again.

Here’s a comparison by specifications:

Givi D1111STgivi-high-protection-windshield-16cm Honda Tall windscreen kithonda-touring-screen
Price (€) 81,65 (cheapest on RAD.EU) 149,00 (I bought mine for 79,71 at NC700shop.com)
Material Acrylic Polycarbonate
Height 49,5 cm 49,5 cm
Mounting Stock windscreen holes Aluminium rack
Looks Sporty, clean, black bottom Aggressive, rugged, clear bottom
Wind Protection Chest height Chest height

As you can see by the table, the height is the same, and the price difference is also noticable. I got my tall windshield cheaper at www.NC700shop.com but the original price is about 171€ (including shipping costs of 22€) which is a price difference from 89,35€.
For the price of 1 Honda tall windscreen, you can buy 2 Givi D1111ST windshields so to speak.

Both windschields work with the Givi HP1111 handprotectors.

Both have their problems and features:

Givi D1111ST Honda Tall windscreen kit
– Prone to cracking + Flexible
+ Cheaper – More expensive
– Uses original bolt holes + Aluminium rack
+ Adjustable using the original bolt holes – Needs modifications to change height
+ Doesn’t yellow overtime – Yellows
+ Scratch resistant – Scratches more easily
+ Wider – Narrow
– No vibration protection + Grommets to resist vibration damage
– Thin + Thicker windshield

Both have their pros and cons, but for me, the reason to buy a tall windscreen from Honda is the aluminium rack to add a GPS mount, and the more flexible windshield.

Polycarbonate windshields are more flexible than acrylic ones, and are also stronger, but not more rigid. To hold their form, they need to have a good bend in it to add some structural integrity.
Acrylic windshields on the other hand are UV and more scratch resistant than polycarbonate windhields. They do however shatter or crack on impact.

The Honda Tall windshield kit has a flaw, and that is that when mounting a windshield extension, it tends to bend in the wind. A solution for this is to add 2 spacers to the upper bolts, bending the windshield and adding structural integrity. However it is more durable than the Givi D1111ST.

Here’s a video of the Install and test ride with the Honda Tall Windschield.

Test ride:
There is a lot more different than just the wind protection.

Because of the wider opening on the bottom of the windshield, it makes a vacuum and removes almost all turbulence. It is however not “all away”. I used a windscreen extension to compare it to the Givi one, and it does feel better. (note: the givi windscreen is also tested with windscreen spoiler).

My findings are (for a guy of 5ft7, 1m72) it feels much better, AND I can reach higher speeds more easily without hiding behind the windshield.

The Honda windshield does wobble more at high speeds, but that isn’t such a big problem.

Final verdict:
I like how much difference in wind protection there is, even when the windshields almost have the same dimensions.

The aluminium rack on the Honda Tall Windscreen has the advantage of being more sturdy, but the Givi one has the advantage of being relatively cheaper compared to the original price of €140,-

The clear winner is the Honda Tall Windscreen with the rack, unbreakableness, rugged look, and the wind protection.


Review: Chinese adjustable clutch and brake levers

Some time in July, I ordered a set of levers for my Honda NC700X.
I chose to go the Chinese way again, because I’ve read more good stuff than bad stuff about those Chinese made levers, and my wallet also tells me I don’t need Pazzo or ASV levers.

Well I bought these on the 14th of July and received these the 7th of August. I’ve even made an install video about it which you can watch here:

Well to start: they are packaged very well. Bubble envelope, wrapped in foam, protected from dings and bangs in transit.

The fitment is also perfect, but the downside is that they don’t have steel bushings to pivot on.

The whole set is made from CNC’d aluminium that has been anodised.
I chose a titanium gray because that is a color that fades the least in direct sunlight.

The Chinese levers have a CNC textured grip surface, but they still feel a bit slippery. However, it is a nice touch and makes it look more expensive.

Capture.PNG
The back side of the levers

Features
This set only has an adjustability function, not being able to swivel up and down in case of a crash, but that actually doesn’t matter anyways because a set of these only costs €20 including shipping.

They can be adjusted 6 steps each using the small lever on the lever itself, and it keeps tension very well I must say because it never slipped out of it’s position.
Note: I also loctited the shit out of the bolts so they never come loose.

They come in many different colors and lever sizes, but I wasn’t sure if I wanted a shorty lever because I’ve never ridden with one before, and it still keeps the “OEM” look when you get the normal length levers.

Installing is easy, if you watch the video. Just loosen 2 bolts, remove the lever, insert the new lever and install the 2 bolts again.
The clutch side is a little bit harder because you have to loosen the barrel from the clutch lever.

Verdict
So now I’ve almost done 7000km on the new levers, and they still feel the same. They didn’t loosen over time, they didn’t bind over time. Just lube the levers up enough to keep it from wearing and rubbing. (even my handlebar muffs that give off a lot of lint didn’t even manage to bind the levers up)

They also look the part and make the bike look sportier too, and the finish of these things is immaculate.
The only downside to these is that they don’t have bushings to counteract wear, but with some grease and general maintaining, it shouldn’t be a problem after all.

If you are in the market for aftermarket levers: Skip Pazzo and ASV or any premium brand and buy china made levers. When you crash you just take out another set, or use the originals again, and go for the next round.

Review: Sena SR10

For almost a year I have a two way radio mounted on my bike to communicate with my dad when he’s riding behind me when we’re touring.

I tried to talk to him over the wired set, but it only transmitted muffled voice and wind noise. Even when I had my chin flap mounted.

He was sick of it and wanted me to buy a Sena SR10.
So I did when they were on stock again.

Our situation
– Bad voice quality
– Bike to car communication
– 1x Sena 3S
– Wired helmet communications

The solution was clear, the Sena SR10 will solve all these problems with wind noise, bike to car communication (this one still doesn’t exist as a standalone version) and it’s wireless!

Package contents
– Sena SR10
– PTT button
– PTT button extension cord (spiral)
– Aux cord (for when you use it with your phone/gps/mp3)
– USB and 12v car adapter
– Belt clip
– Handlebar mount kit

You still need a proprietary cable to connect your Sena SR10 to either iCom, Motorola single pin, Motorola dual pin, Yaesu, Midland and Kenwood two way radios.
These cost about 24€

I have an iCom and Motorola Single pin device. In the pic below you can see the iCom radio, because I still don’t have acquired a Motorola Single pin cable.

IMG_20170727_170051

So how does it do it?
It’s simple: Sena Magic!
For what I know, the PTT button will transmit when the SR10 is powered on, but no voice will come through if no headset is paired.
The SR10 should work with all bluetooth headsets, but with my Sena 3S I had to press the “+” button for 5 seconds to pair in “phone” mode instead of the intercom mode.

The cool thing is that the louder you set the volume on the radio, the louder it gets on the speaker.
Combined with Sena products, the sound quality is amazing, without wind noise! (as per my dad.)

Mounting on the bike/yourself
I have made a gadget rack that connects the whole “intercom array” to the bike using a rip off gopro mount. It works especially well.

IMG_20170727_183204
It’s much more easier to mount and remove the whole array than removing the SR10, intercom, cables and all that one by one.

You can also choose to use the belt clip or handlebar mount to attach it to your belt or handlebars.

Pros&cons
+ Universal pairing
+ Incredible sound transmission
+ Long stand by time
+ “Weatherproof”

– Rather expensive at 180€-200€
– Proprietary cables that cost 24€ extra
– Bit bulky

Final verdict
It’s Sena quality, so it should be all good and waterproof.
With the right radio, bike to car communications will be easier than calling.

I’ve never travelled longer than 7 hours straight, so I can’t know how long the Sena could do in stand-by and talk times, but that shouldn’t be a problem because you can charge it via a powerbank using a micro USB cable.

If you are a person that rides a motorbike and occasionally have a follow car and a two way radio set to spare, the Sena SR10 should be the solution to your problem!