Building a Samsung Galaxy S8+ Smartphone mount

Since I’ve bough a new phone that is waterproof, and fast enough to give me instructions via the GPS, I wanted to build a good custom mount for it.

There are waterproof cases including mounts for the S8+ on Ultimateaddons.com, should you want to buy a case for the bike. The prices of these are also good, but they are only for phones without a case. Thus bringing me to this idea.

I’ve had some styrene sheet laying around, and began mocking up the outline of the phone including the case.

This is what I came up with:

I painted it black, and wanted to test the quality of the work, which ultimatly failed by cracking the seam that holds the shade together.

Seeing this flaw in my design, but having already built a good platform, I began to improve it by adding another layer of styrene sheet to the original layers.
This needed some sanding to remove the seams between the glued pieces.

To reinforce it even more, I added some strips to the back side to cover those seams too.

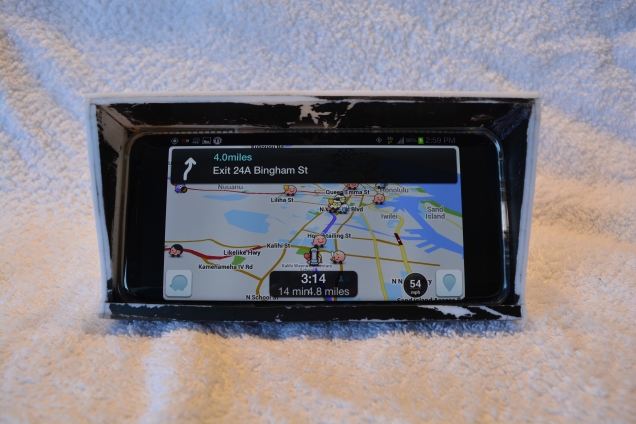
As you can see, there is a hole in the back to put your finger through to remove the phone, because it’s locked in there tight, even without the charger attached to it.
The charging cable also doubles as a “lock” to keep the phone in place.
This works like a charm and is safer than just clamping it with a spring loaded clamp.

In the pictures above this text you can see how the charging port makes sure the phone doesn’t move.

Here you can see that I’ve added drain holes to remove unwanted water from the dock, should it get wet. I tested this in the sink, and it works perfectly to remove the water inside.
This should also work when the bike is parked outside without the phone in it.

pre finished mount
Waze is a great motorcycle navigation app (more info @ www.waze.com)

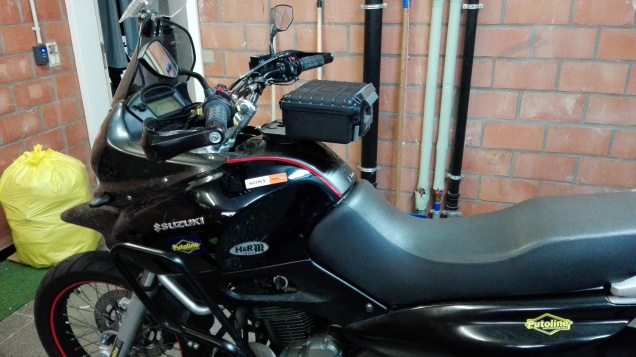
The cradle has been painted to make it look a bit better, and now has been mounted to the bike.

In the last picture you can see that the phone can be placed in the mount in one way, so it could never fall out on accident. It is a friction mount, so no locking hardware is needed (except for the USB-C cable) to lock the phone in place.

A few remarks:
I have bought a China-made RAM mount (X-grip copy), and the only things that are usable are the RAM balls.
They are made of a cast rubber ball on a hard (composite/abs) base.

I wasn’t aware that the original RAM arms are made of metal, which means that the arm is prone to cracking if you tighten it too much. This happened, and I’ve bought a genuine RAM arm since, and that works like a charm!

Here’s a video explaining (almost) everything should you want to watch it:

Freezing my hands off, how to fix it?

The blog wasn’t kept up to date, that’s because nothing special has happened for the past months. Just the regular “idiots on the road”, and some minor maintenance on the XF650.
It was freezing cold for about a week, and I bought some GoreTex gloves, but they aren’t as thick as I thought they would be.
Already having some handguards (from plastic) I thought these would protect me from the wind chill and rain. Boy was I wrong!

My hands were freezing, and when I turned up the heat on my heated grips, nothing happened, I didn’t feel a tiny bit of heat.
Now I know, heated grips only work with thin gloves, but the windchill was so hard that I couldn’t even feel it.

I went online and searched for handguard wind protectors, but they cost around €20,00, which was too much for me (I’m a cheapskate), and delivery will take a few days.
So I took a plant tray with some thick plastic (PVC), and snipped it with some generic scissors.

I then drilled some holes in it, and bolted it straight into the existing handguards that were too small.

This is the result:

This slideshow requires JavaScript.

I thought they’d flap in the wind, but fortunatly they didn’t. It kept the rain from my hands, but the wind still finds a way into the handguards, but it isn’t that bad.

The extensions don’t look homemade, and it fits the grayish color on the front cowl.
I didn’t even have to turn on the heated grips and it was about 3°C.

This was a fun little project (which took me about half an hour) that you can do it yourself to your bike when you have the same problems as me!

Go on, make something and have a nice day!

How to make a “Peli” tankcase/tankbag

In my post “Radiosilence… Small update” I’ve written about making my own tankbag/tankcase. After reading and searching on advrider.com about people that also have made these, I went on and made on of those cases too.

The main idea behind this, is that I have a safe, theft proof box which is easily accessible for the rider (me) and is cheaper than an off the shelf tankbag.

I’m still planning on powering this box to 12v, but it’s completely optional.

Warning! This is not safe for the rider!
It increases risk of broken ribs/chest damage when you crash using this device!

Shopping list:
– SW-Motech Quicklock (1st or 2nd gen) plates, both for the tank and box
– Pelican case (I’ve bought a ripoff that is about as big as a peli 1150)
– Piece of metal plate
– Some bolts and nuts
optional:
– SAE or barrel plugs
– 12vdc to 5vdc converter

Note: You can also use the Givi Tankring system if that’s what you want.

Let’s get started!

First you need to find out in what position you want your tankcase.
You can choose between portrait or landscape, for me landscape did the trick.

Allright, now you’ve chosen in what position you want it.
As you see, the box doesn’t cover enough of the gas cap. That’s why I needed a steel plate to extend the footprint of the case.
Now to mount the steel plate to the case.

This slideshow requires JavaScript.

The bolts I used were a bit too long, I cut a small lenght of them with an angle grinder.
Option: You can now cover your tankcase with some foam material to protect you from getting more injured when you crash.

On to mounting the Quicklock rings to the steel plate (or your box)!

This slideshow requires JavaScript.

I needed the handlebar risers to get enough space to turn my handlebars from lock to lock.
Now you can also decorate the insides of your own waterproof, theft proof (when using padlocks) tankcase!

I also bought a roost guard/chest protector to protect my chest in case I crash with the tankcase, but normally it’ll shear off because it’s plastic.

Now you might think:
“Hey! They just take off the Quicklock and run away with your tankbag!”

Well, I have a tethered padlock that keeps the tankcase closed and secure to my bike.
It uses an “armored” spiral cord so that nothing flaps around when riding.

This is the final result!

IMG_20160514_145851

Happy building and remember, always ride safe!


Review: Carpoint E11 foglights

My search for new foglights has finally ended, after days of looking for a suitable replacement for the Hans Bo CREE U5 LED spots.
The weird part is that they were always close to me, in my local diy store!

Since my old “new” Hans Bo LED spots began to flicker and became totally uncontrollable by the switch, I’ve been searching for a replacement.
Not wanting to spend more than 50€, I searched on AliExpress for foglights that only had 1 mode, but almost all of them have the “high”, “low” and “strobe” mode.

I remembered that in my local diy store, they also have a car parts department, so I browsed a bit and found some foglights from “Carpoint” (cheap car accessories) for about 35€.

So I picked them up, and they looked promising, but they didn’t have a pipe clamp.
I looked around for some steel pipe clamps (with rubber inside) but they only had plastic ones for conduit pipe.
I picked 6 pieces up (if one happens to break) which costed me about 9€.

I began disassembling the old fog light setup, which was very easy because I already ripped out the cables of the terminal block, as told in the blogpost “Radiosilence… Small update“.
Having a spare relay that I bought from AliExpress a few months ago, I installed them using the following schematic:

DLR ACC schakel

The specifications of the fog lights are:
– Voltage: 12V
– Watts: 55w each (110w total)
– Bulb: H3 halogen
The Suzuki XF650 Freewind has an alternator capable of handling 200W.

After installing them on my pipe clamps and crashbars, it looked like this:

This slideshow requires JavaScript.

After riding around, one of the pipe clamps broke because of the vibration and being clamped down too hard, so the extra clamps were a great investment.

The light output is much higher and more scattered, but they also run hotter and consume more power. It’s also easier on the eye than the blue hue of the LED ones.
They are completely waterproof by using a siliconed gasket.

I’m currently totally loving it, and will be using this at night.

Thanks for reading and ride safe!